OTHER WAYS TO SHADE
PRACTICING LINES
When drawing lines, it is not necessary to always use a sharp point. In fact, sometimes a blunt point may create a more desir able effect. When using larger lead diameters, the effect of a blunt point is even more evident. Play around with your pencils to familiarize yourself with the different types of lines they can create. Make every kind of stroke you can think of, using both a sharp point and a blunt point. Practice the strokes below to help you loosen up.As you experiment, you will find that some of your doodles will bring to mind certain imagery or textures. For example, little Vs can be reminiscent of birds flying, whereas wavy lines can indicate water.

Drawing with a Sharp Point
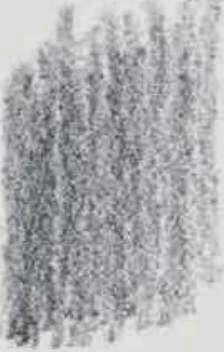
First draw a series of parallel lines. Try them vertically; then angle them. Make some of them curved, trying both short and long strokes. Then try some wavy lines at an angle and some with short, vertical strokes. Try making a spiral and then grouping short, curved lines together. Then practice varying the weight of the line as you draw. Os, Vs, and Us are some of the most common alphabet shapes used in drawing.

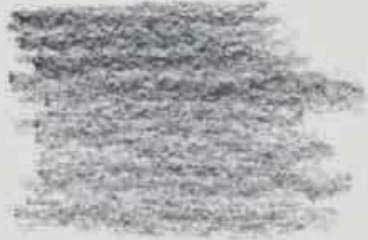
It is good to take the same exercises and try them with a blunt point. Even if you use the same hand positions and strokes, the results will be different when you switch pencils. Take a look at these examples. The same shapes were drawn with both pencils, but the blunt pencil produced different images. You can create a blunt point by rubbing the tip of the pencil on a sandpaper block or on a rough piece of paper.
PAINTING" WITH PENCIL
When you use painterly strokes, your drawing will take on a new dimension. Think of your pencil as a brush and allow yourself to put more of your arm into the stroke. To create this effect, try using the underhand position, holding your pencil between your thumb and forefinger and using the side of the pencil. (See page 11.) If you rotate the pencil in your hand every few strokes, you will not have to sharpen it as frequently. The larger the lead, the wider the stroke will be. The softer the lead, the more painterly an effect you will have. These examples were all made on smooth paper with a 6B pencil, but you can experiment with rough papers for more broken effects.
Starting Simply First experiment with vertical, horizontal, and curved strokes. Keep the strokes close together and begin with heavy pressure. Then lighten the pressure with each stroke.
Varying the Pressure Randomly cover the area with tone, varying the pressure at different points. Continue to keep your strokes loose.

Using Smaller Strokes Make small circles for the first example. This is remi niscent of leathery animal skin. For the second example (at far right), use short, alternating strokes of heavy and light pressure to create a pattern that is similar to stone or brick.

Loosening Up Use long vertical strokes, varying the pressure for each stroke until you start to see long grass (at right). Then use somewhat looser movements that could be used for water (at far right). First create short spiral movements with your arm (above). Then use a wavy movement, varying the pressure (below).


FINDING YOUR STYLE
Many great artists of the past can now be identified by their unique experiments with line. Van Gogh's drawings were a feast of calligraphic lines; Seurat became synonymous with pointillism; and Giacometti was famous for his scribble. Can you find your identity in a pencil stroke?
WORKING WITH DIFFERENT TECHNIQUE
Below are several examples of techniques that can be done with pencil. These techniques are important for creating more paint erly effects in your drawing. Remember that B pencils have soft lead and H pencils have hard lead-you will need to use both for these exercises.
Using Cross-Crossed Strokes If you like a good deal of fine detail in your work, you'll find that crosshatching allows you a lot of control . You can adjust the depth of your shading by changing the distance between your strokes.
Sketching Circular Scribbles If you work with round, loose strokes like these, you are prob· ably very experimental with your art. These looping lines suggest a free-form style that is more concerned with evoking a mood than with capturing precise details.
Drawing Small Dots This technique is called "stippling" -many small dots are used to create a larger picture. Make the points different sizes to create various depths and shading effects. Stippling takes a great deal of precision and practice.
Simulating Brush strokes You can create the illusion of brush strokes by using short, sweeping lines. This captures the feeling of painting but allows you the same control you would get from cross hatching. These strokes are ideal for a more stylistic approach.

Creating Washes First shade an area with a water soluble pencil (a pencil that produces washes similar to watercolor paint when manipulated with water). Then blend the shading with a wet brush. Make sure your brush isn't too wet, and use thicker paper, such as vellum board.
Rubbing Place paper over an object and rub the side of your pencil lead over the paper. The strokes of your pencil will pick up the pattern and replicate it on the paper. Try using a soft pencil on smooth paper, and choose an object with a strong textural pattern. This example uses a wire grid.
Lifting Out Blend a soft pencil on smooth paper, and then lift out the desired area of graphite with an eraser. You can create highlights and other interesting effects with this technique.
Producing Indented Lines Draw a pattern or design on the paper with a sharp, non-marking object, like a knitting needle or skewer, before drawing with a pencil. When you shade over the area with the side of your pencil, the graphite will not reach the indented areas, leaving white lines.
SMUDGING
Smudging is an important technique for creating shading and gradients. Use a tortilla or chamois cloth to blend your strokes. It is important to not use your finger, because your hand, even if clean, has natural oils that can damage your art.

Smudging on Rough Surfaces Use a 6B pencil on vellum-finish Bristol board. Make your strokes with the side of the pencil and blend. In this example, the effect is very granular.

Smudging on Smooth Surfaces Use a 4B pencil on plate-finish Bristol board. Stroke with the side of the pencil, and then blend your strokes with a blending stump.
No comments:
Post a Comment