INDICATING FAIR FEATURES
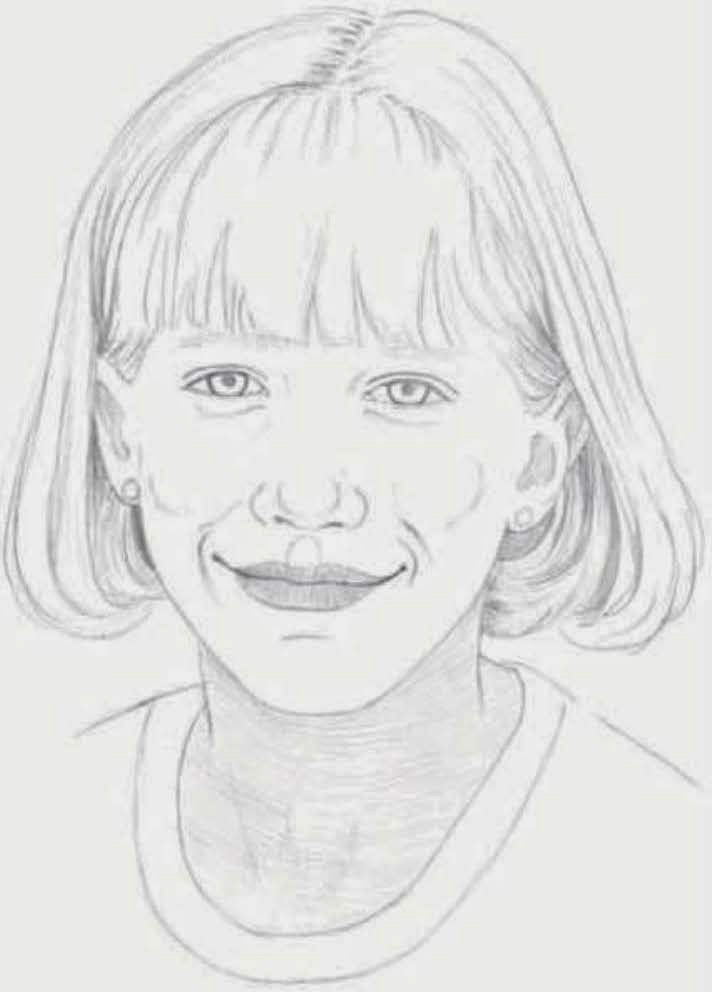
When drawing a subject with fair skin and hair, keep your shading to a minimum; apply just enough medium and dark values to create the illusion of form without creating the appearance of color. Draw blond hair by outlining the general shape, then adding a few carefully placed strokes to suggest the hair style and create some dimension. Keep in mind that light, wispy eyebrows and freckles often accompany fair skin and hair.
When drawing a subject with fair skin and hair, keep your shading to a minimum; apply just enough medium and dark values to create the illusion of form without creating the appearance of color. Draw blond hair by outlining the general shape, then adding a few carefully placed strokes to suggest the hair style and create some dimension. Keep in mind that light, wispy eyebrows and freckles often accompany fair skin and hair.
Shading Fair Skin and Hair In this photo, the over head light makes the bangs, nose, and cheeks look nearly pure white, so I avoid these areas when shading my drawing, leaving much of the paper white.
Step One First I lay out the face with an HB pencil. The face is slightly tilted to the subject's left, so I shift the vertical center line to the left a bit as well. I lightly place the eyes, nose, mouth, and ears, then block in her long, slender neck.
Step Two Switching to a 2B pencil, I develop the features. Although I use the photo for a reference, I use artistic license to adjust my rendering as I see fit. For example, I sketch the bangs so they fall straight onto her forehead, rather than being swept to the side as they are in the photo. I also omit the strand of hair that is blowing in the wind.
Step Three Now I refine the features, erasing my guide lines as I draw. I continue building up the hair, leaving the top and sides mostly white, adding only a few dark strands here and there. The darkest values are around the ears where the hair is in shadow. Next I add small circles for the earrings and shade the insides of the ears. I develop the lips, then use horizontal strokes to shade the neck
Step Four I shade the face with light, soft strokes to depict the subject's fair skin. Then I make short, quick strokes for the eyebrows, keeping them light and soft to indicate blond hair. Next I shade the irises using strokes that radiate out from the pupil. I also add some hatching strokes to the neckband of the shirt.
Step Five Using a kneaded eraser, I pull out a highlight on the bottom lip. Then I create more dark strands of hair and further develop the eyes and eyebrows. I begin adding freckles, making sure that they vary in size and shape. (See "Creating Realistic Freckles" below.) Finally I shade the shirt, using relatively dark strokes. It's easy for a blond subject to look washed out on white paper, so the dark values in the shirt help frame the subject and make her face stand out.
CREATING REALISTIC FRECKLES
To draw freckles, space them sporadically, in varying sizes and distances from one other. You don't have to replicate every freckle on your subject's face-just draw the general shapes and let the viewer's eye fill in the rest. What to Do Make sure some of the freckles overlap, and make some light and some dark by varying the pressure you place on the pencil.
What Not to Do When drawing freckles, do not space them too evenly or make them
equal in size, as shown here. These freckles look more like polka dots!
DEPICTING FINE HAIR
Blond hair is often finer than darker hair, especially in children. Draw fine hair in narrow sections, leaving plenty of white areas showing through the dark values. Add some short, wispy strands of hair at the forehead to frame the face


No comments:
Post a Comment