DEVELOPING A PORTRAIT
Drawing a person really is no different than drawing anything else. A human face has contours just like a landscape, an apple, or any other subject-and these contours catch the light and create shadow patterns just as they do on any other object. The difference is that the contours of the face change slightly from individual to individual. The "trick" to portraiture is observing these differences and duplicating them in your drawings.
CAPTURING A LIKENESS
You don't need to memorize all the bones, muscles, and tendons in the human head to draw a portrait; just follow the general rules of proportions, as shown in the chart at right. Simply divide the face into thirds, and note where the features fall in relation to the face and to one another. Then study your model to determine how his or her face differs from the chart (that is, how it is unique). Look for subtle changes, such as a wider nose or thinner lips, wide- or close-set eyes, or a higher or lower forehead. It also is important to practice drawing faces from different viewpoints-front, side, and three-quarter views-keeping the proportions the same but noting how the features change as the head turns. Remember: Draw what you really see, and your portrait will look like your model!
Facial Proportions This chart shows some general guidelines for facial proportions. The eyes sit in the middle of the head. The distance from the hair line to the brow line is usually the same distance as from the brow line to the bottom of the nose and from the bottom of the nose to the chin. The lower lip rests halfway between the bot· tom of the nose and the chin. The eyes are one eye·width apart, and each eye is the same width as the nose. The width of the mouth is the distance from the center of one eye to the center of the other eye. The top of the ear aligns with the brow line; the bottom of the ear aligns with the nose.
A Lips In a frontal view, - - the upper lip has two "peaks" and a slight pro· intrusion in the center. The lower lip is fleshier and has no sharp peaks. When shading, I defined the bottom edge of the lower lip by shading the area directly below it.
A Eyes In a side view, the eye has a triangular shape. The iris has an oval shape, and the eye· lids slightly cover it at the top and bottom. When shading, I concentrated on developing the iris, lashes, and lids, leaving most of the brow white.
A Nose In a three· quarter view, the far nostril is partially hid· den from sight. The light strikes most strongly on the center ridge, so I ere· ated the form by shading the side of the nose, under the tip, and outside the nostril.
Front View In a frontal view, we can see that the face is not perfectly symmetrical. One eye is generally smaller than the other, or one might sit at a slightly different angle. The same is true of the ears, cheeks, and the sides of the nose and the mouth.
Profile The head shape changes in a side view, but the features remain in the same relative positions. Although the nose is a prominent feature in profile, take care not to let it dominate the face. Also pay attention to where the eye sits and how the lower lip curves into the chin.
Three-Quarter View This view can be challenging because you have to distort the features to make them look realistic. Here I changed the eye and lip shapes to curve with the face. You might want to start with a contour drawing to work out how the features really look.
Drawing from a Snapshot
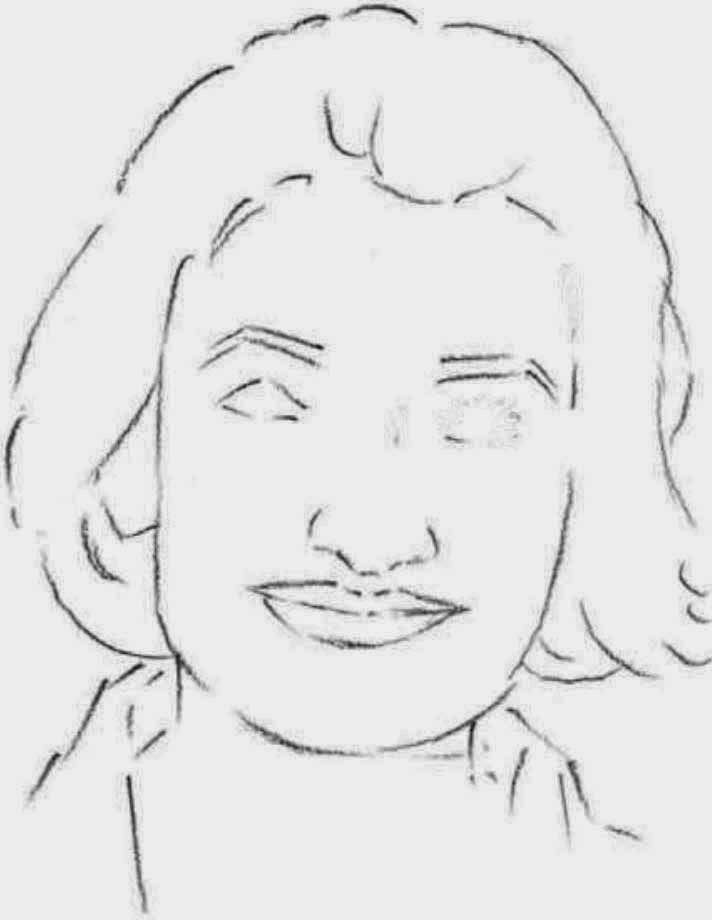
Although I prefer to draw portraits from a live model, sometimes a black-and white photo works just as well-and it doesn't get tired of posing! In this photo of Jenna, I see her delicate features, smooth skin, and sparkling eyes. But I'm also going to try to capture the features that are unique to her: the slightly crooked mouth, smile lines, and wide-set eyes. Note also that you can barely see her nostrils. It's details like these that will make the drawing look like Jenna and no one else.
Step Four I continued building up the shading with the charcoal pencil and willow stick. For gradual blends and soft gradations of value, I rubbed the area gently with my finger. (Don't use a brush or cloth to remove the excess charcoal dust; it will smear the drawing.) When I was finished, I took the drawing outside, turned it over, and gently tapped the back side to release any loose charcoal dust. Finally, I sprayed it lightly with fixative to protect it from further smudging.
Step One
I started with a sharp HB charcoal pencil and very lightly sketched the general shapes of Jenna's head, hair, and collar. (I chose charcoal for this drawing because it allows me to achieve very subtle value changes.) Then I lightly placed her features.
Step Two
Next I began refining her features, adding the pupil and iris in each eye, plus dimples and smile lines. At this stage, I studied the photo carefully so I could duplicate the angles and lines that make these features uniquely Jenna's. Then I began adding a few shadows.
Step Three
As I developed the forms with shading, I used the side of an HB charcoal pencil and followed the direction of the facial planes. I shaped a kneaded eraser to a point to lift out the eye highlights, and I used a soft willow charcoal stick for the dark masses of hair.
No comments:
Post a Comment